A brief walkthrough of importing a Maven project into Eclipse projects prepared for students taking CS-320 Software Testing, Automation and Quality Assurance.
Eclipse is one of the two most widely used IDEs today…and it's free! Since IDEs are powerful tools they can also be complicated to master, especially when just starting out using one. When first opening Eclipse you are faced with a blank screen after you close the "Welcome to Eclipse" tab. The first thing you need to do is import the project that you downloaded and uncompressed (or unzipped).
Step 1
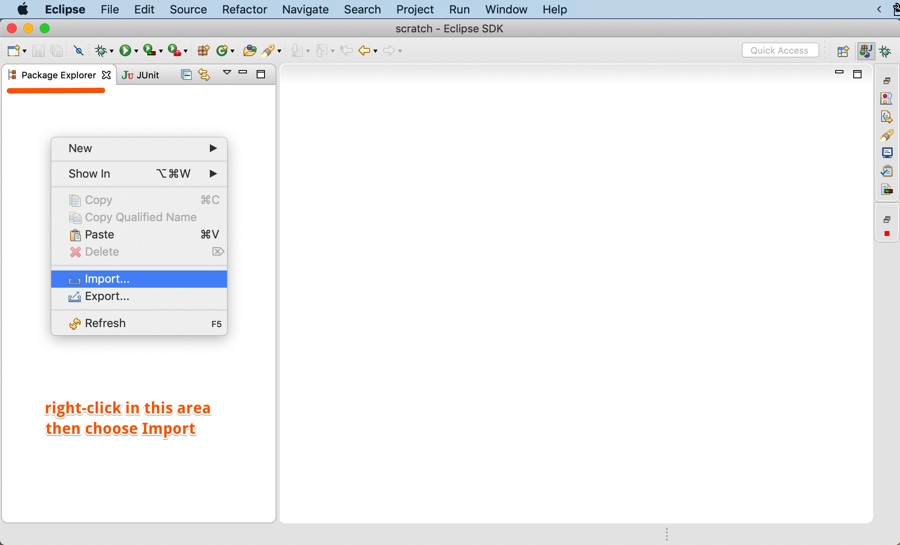
Right-click anywhere in the Package Explorer tool window area on the left and choose "Import…"
Step 2
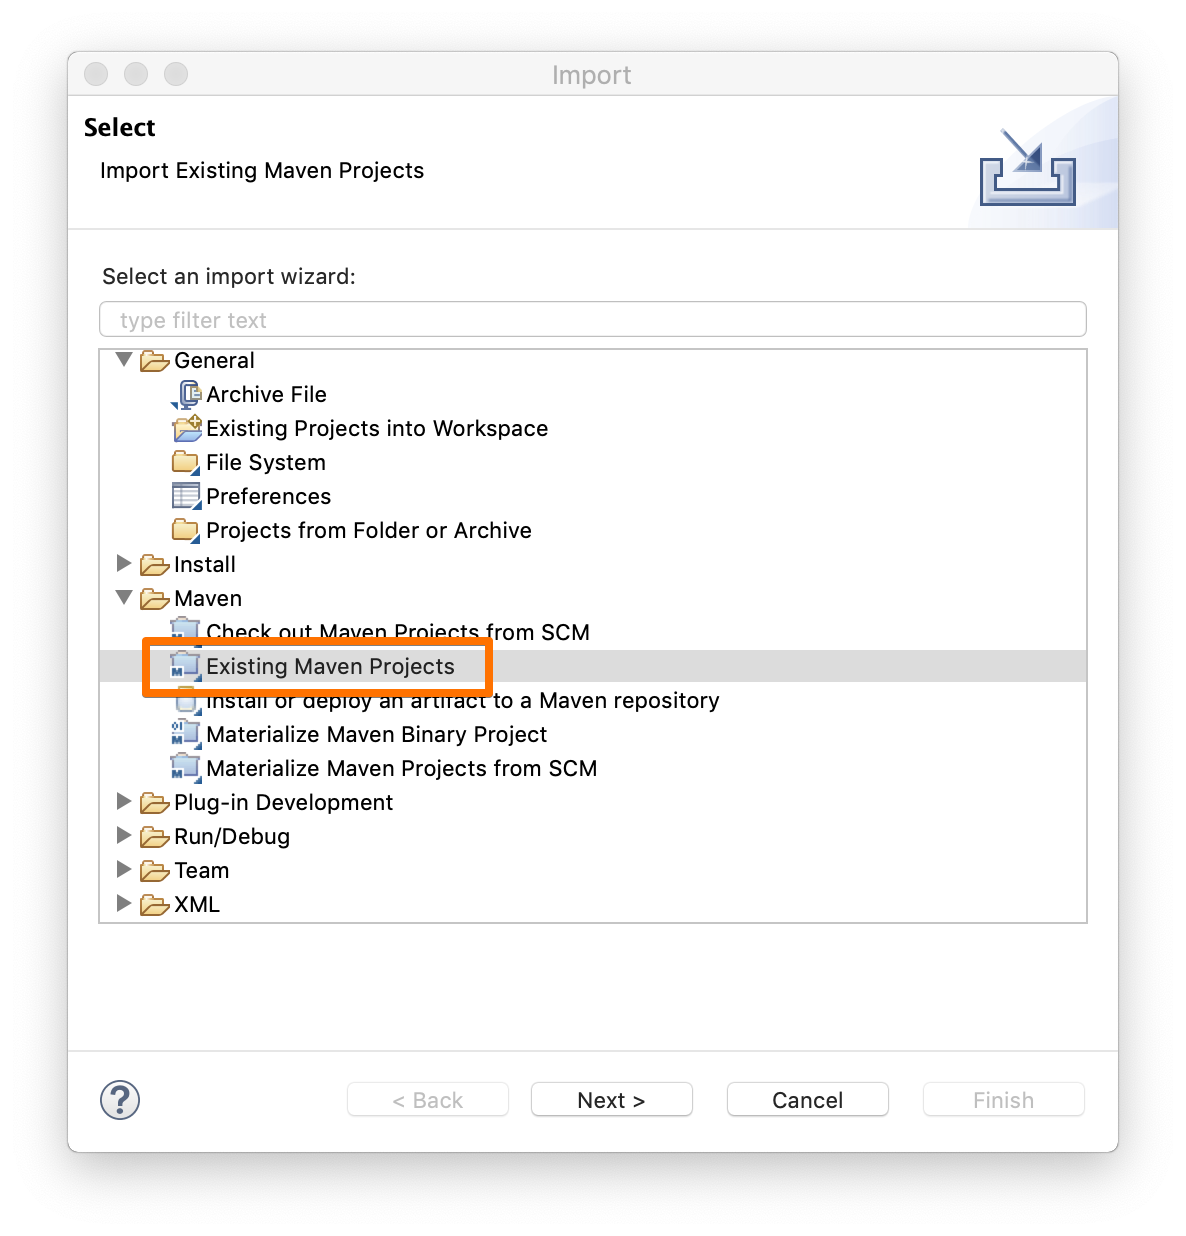
On the Import dialog, choose "Existing Maven Projects":
Step 3
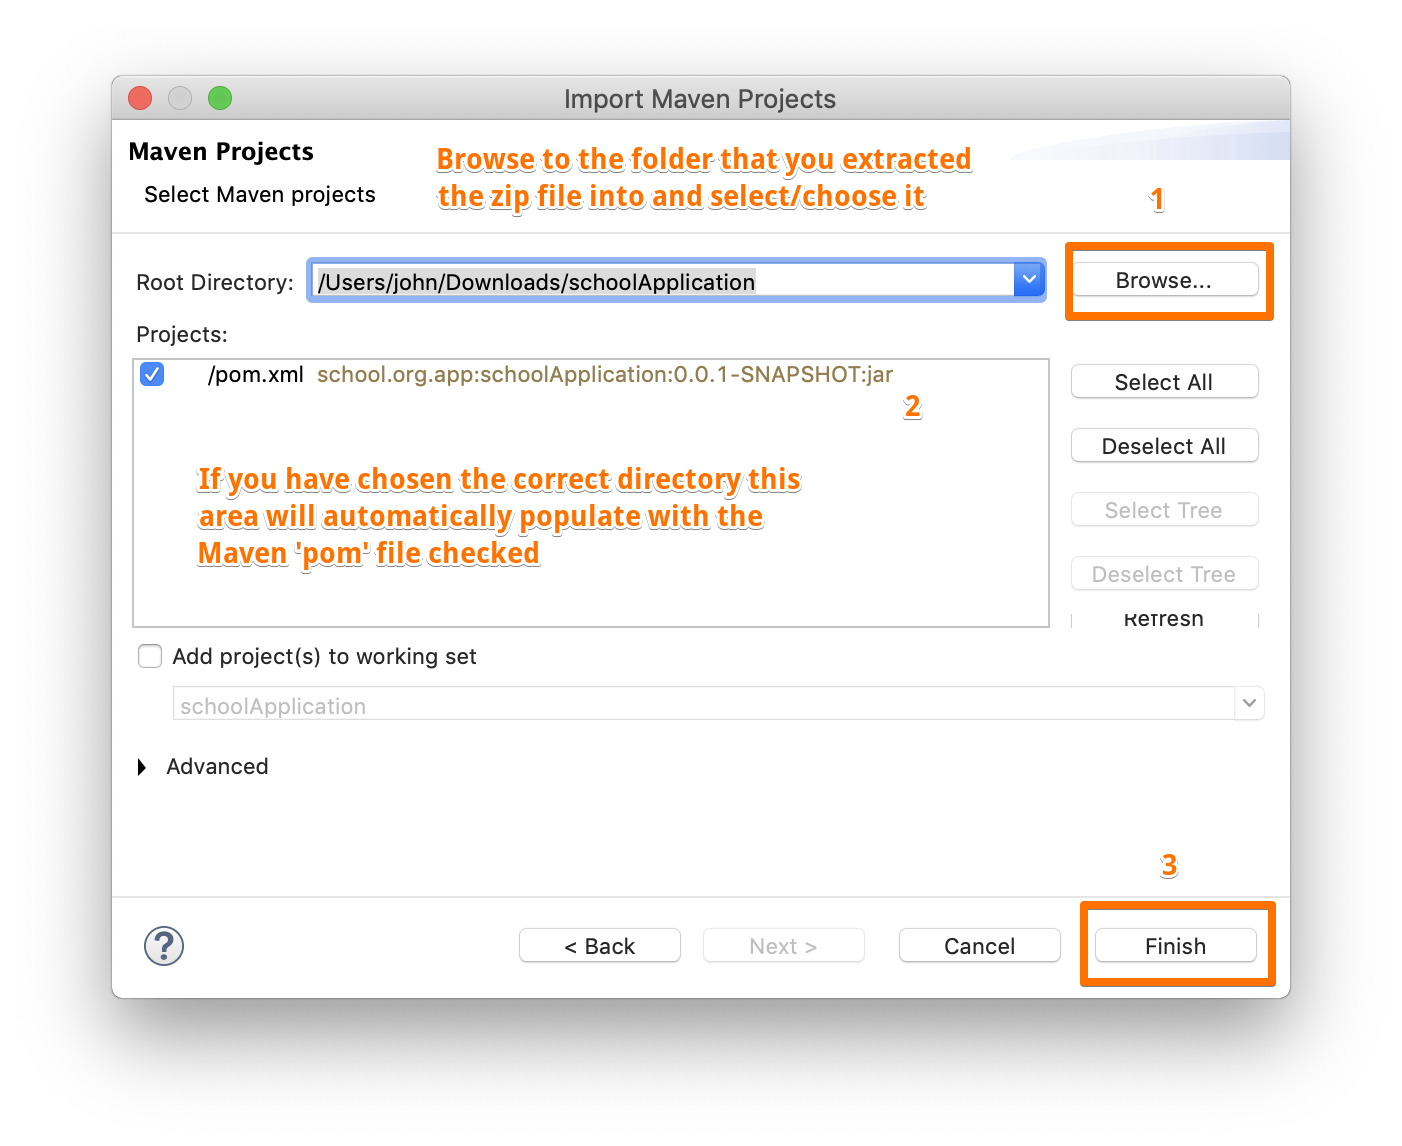
On the Import Maven Projects dialog, click "Browse" and select the folder containing the uncompressed source project:
Step 4
After clicking Finish you'll be returned to the Eclipse main window with the Package Explorer now containing the project you just imported:
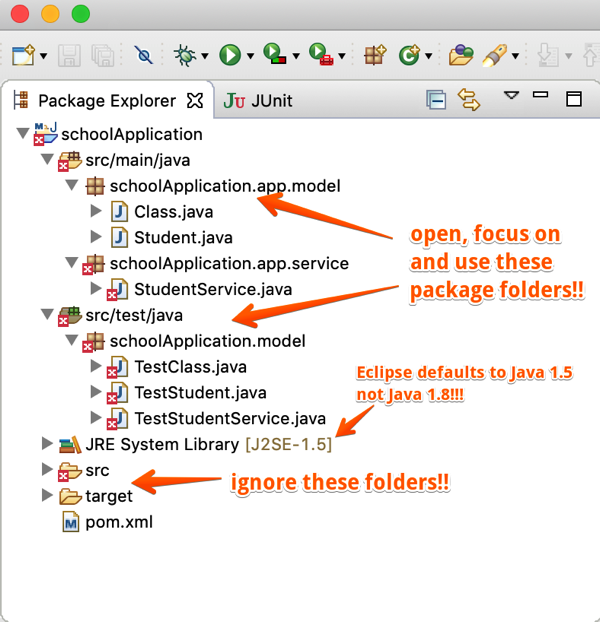
Be sure to open and work in the package folders near the top of the tree and not the source ("src") folder near the bottom! Notice that the Java Library version is 1.5 - this is (unfortunately) the default version that Eclipse starts with so you may have to change it.
Step 5
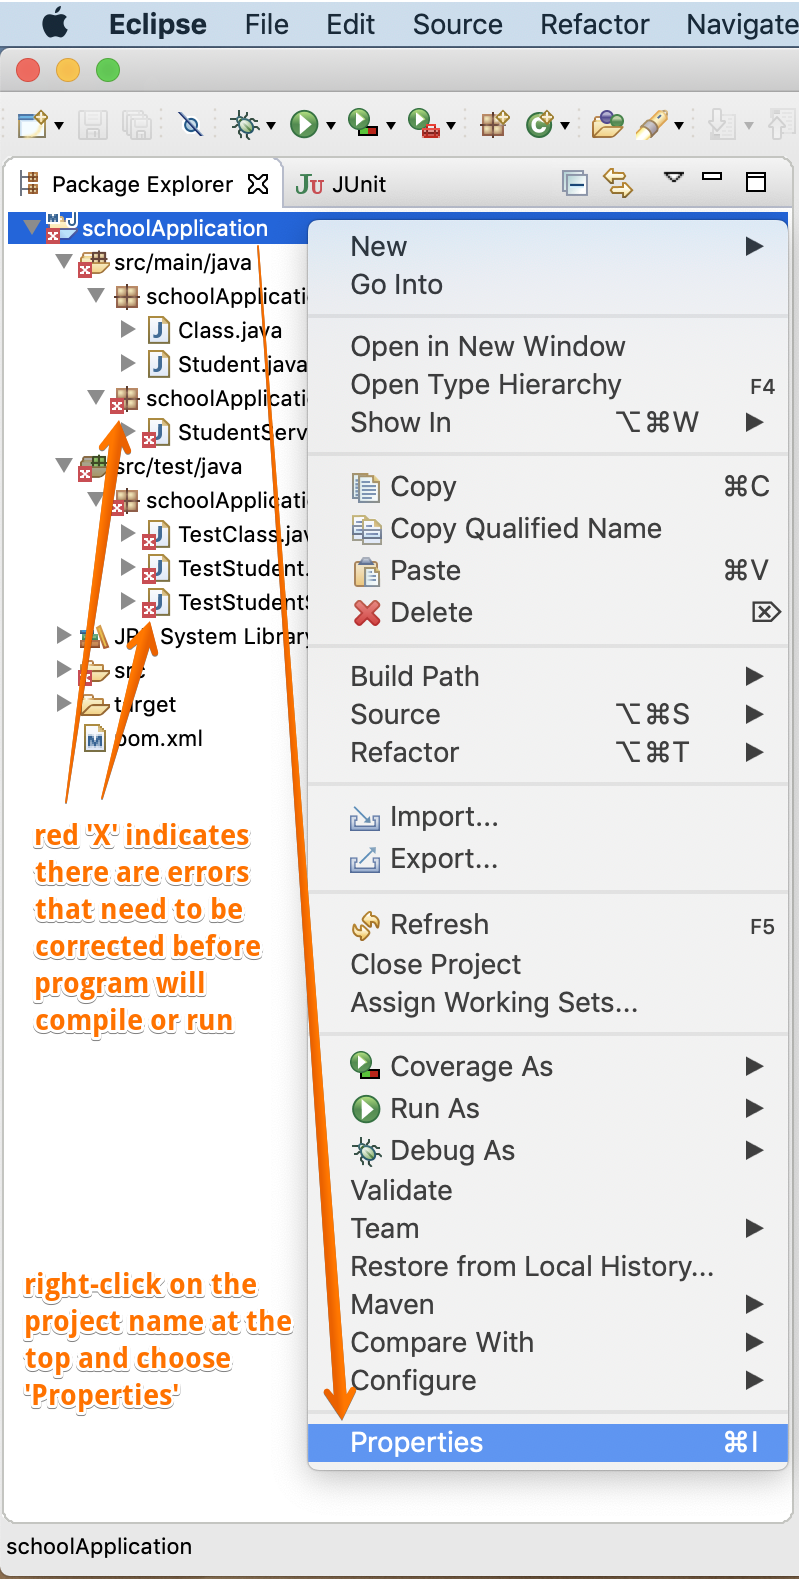
Right-click on the project name at the top of the tree and choose "Properties":
Step 6
Make sure "Java Build Path" is selected on the left and then click the "Libraries" tab. Notice that the referenced libraries in the list is wrong or incomplete. Click the "Add Library" button:

Step 7
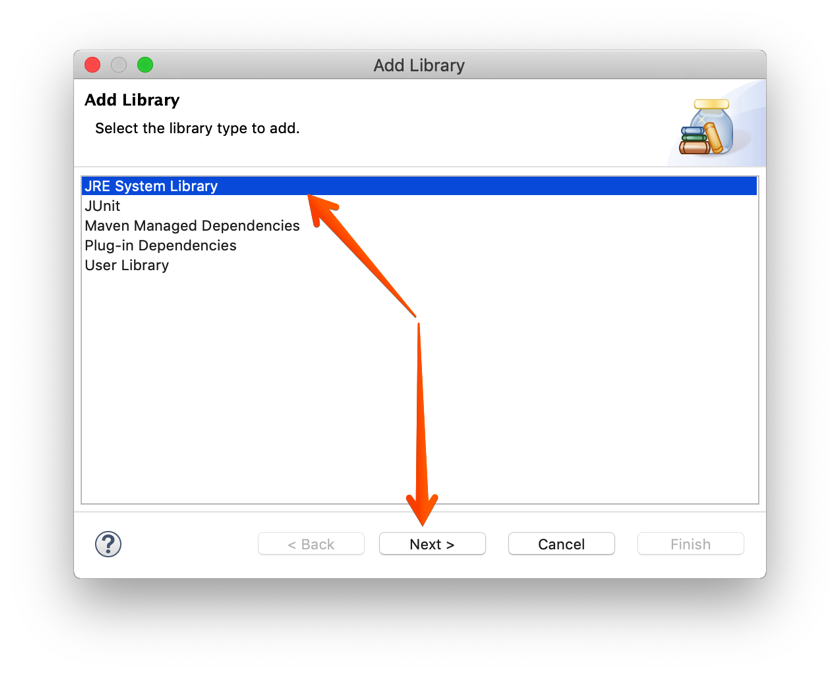
Choose "JRE System Library" and then click "Next":
Step 8
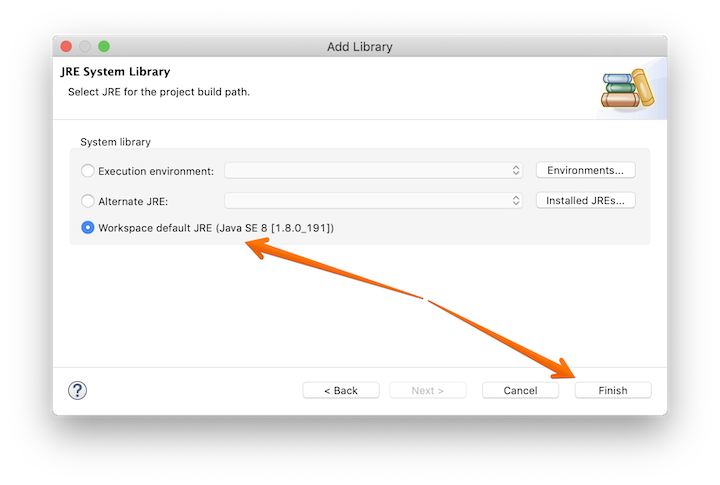
Choose the "Workspace default JRE" which should be Java 1.8 if you've installed the Java SDK correctly on your machine.
Step 9
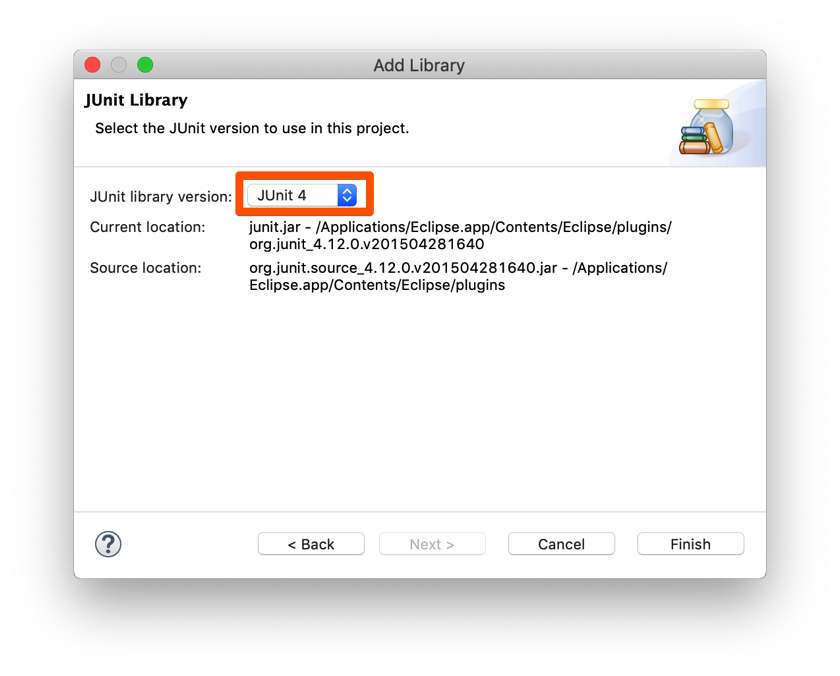
Now repeat the process to add JUnit if it is not already in the list of referenced libraries. When choosing JUnit pick either 4 or 5 depending on what the imported project uses:
Step 10
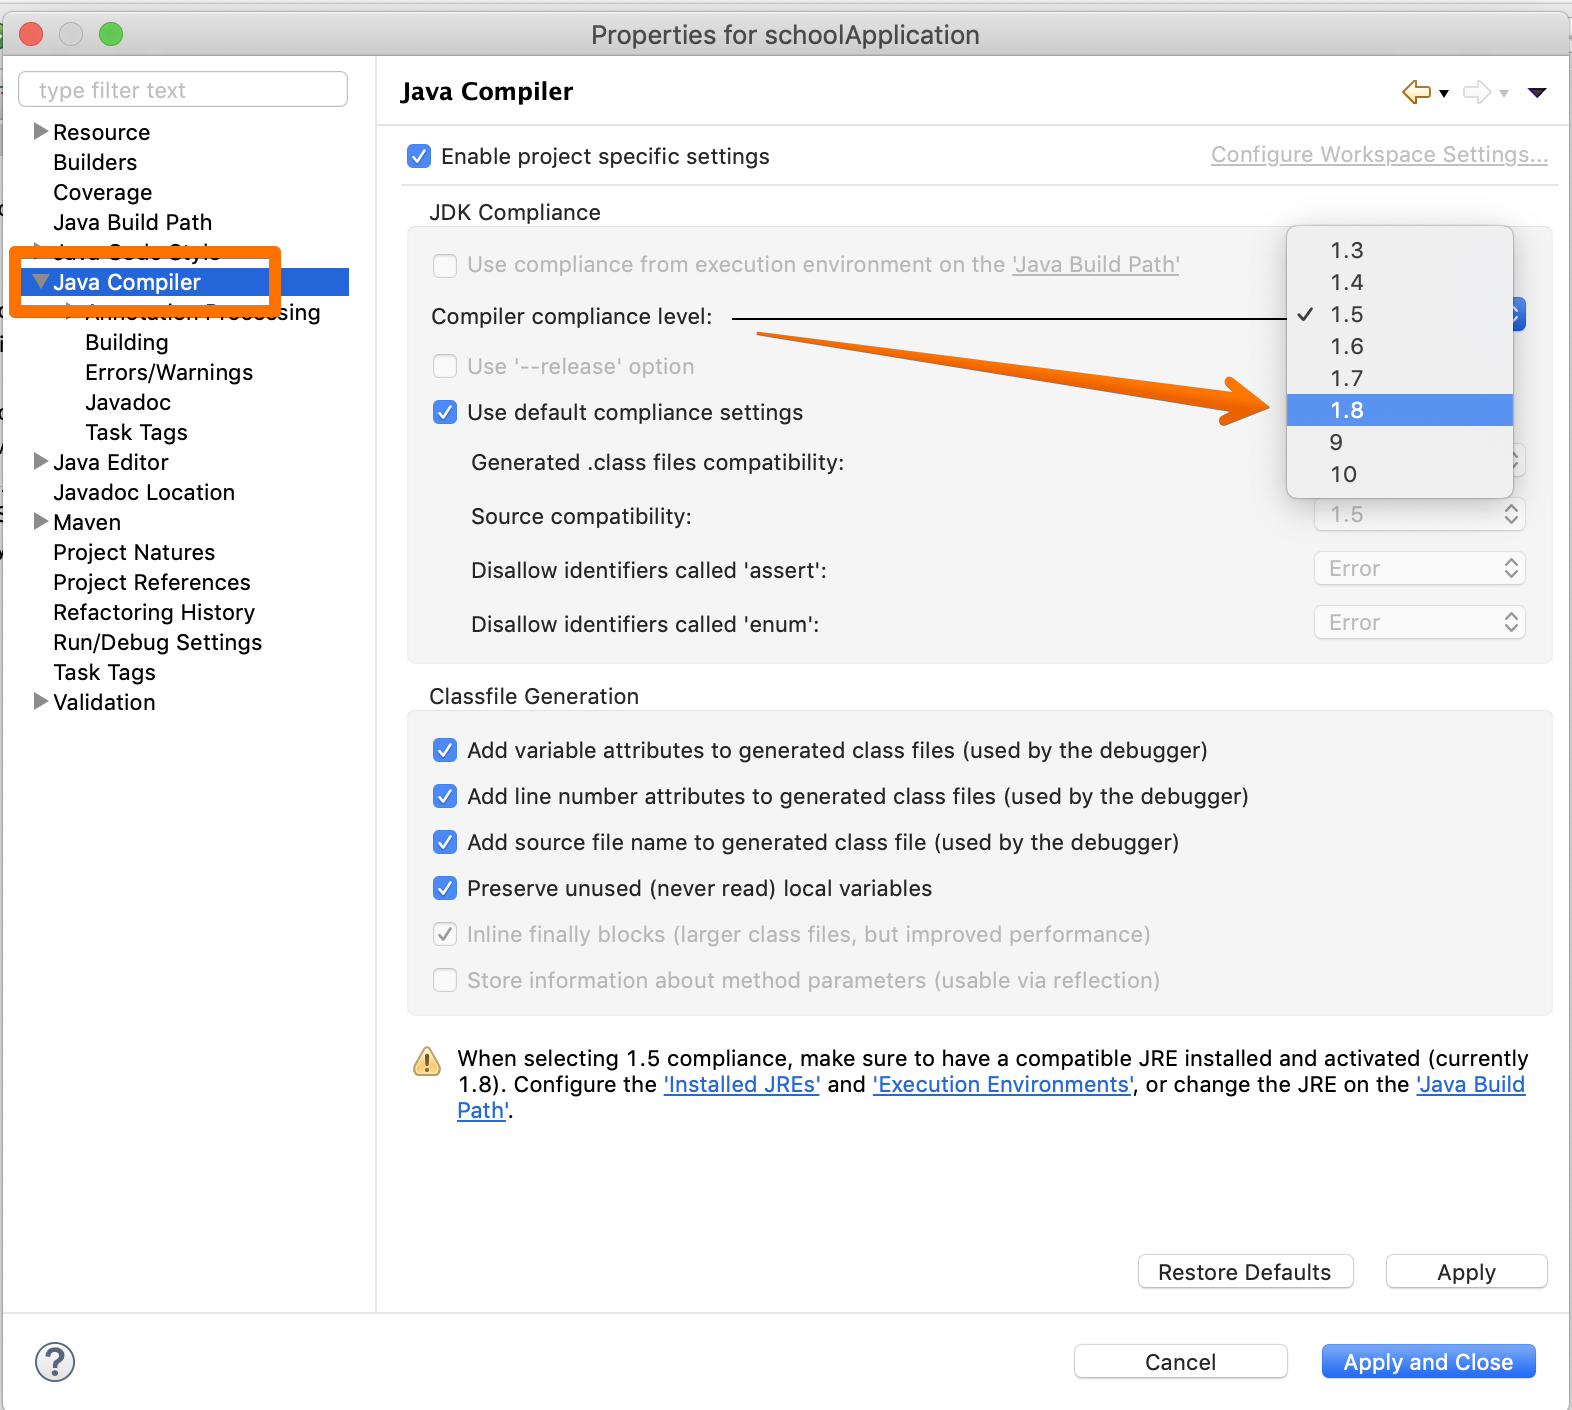
Now, select the "Java Compiler" category on the left and ensure the "Compiler Compliance Level" is set to 1.8 or newer. For most cases, the compliance level and compiler chosen should always match.
Step 11
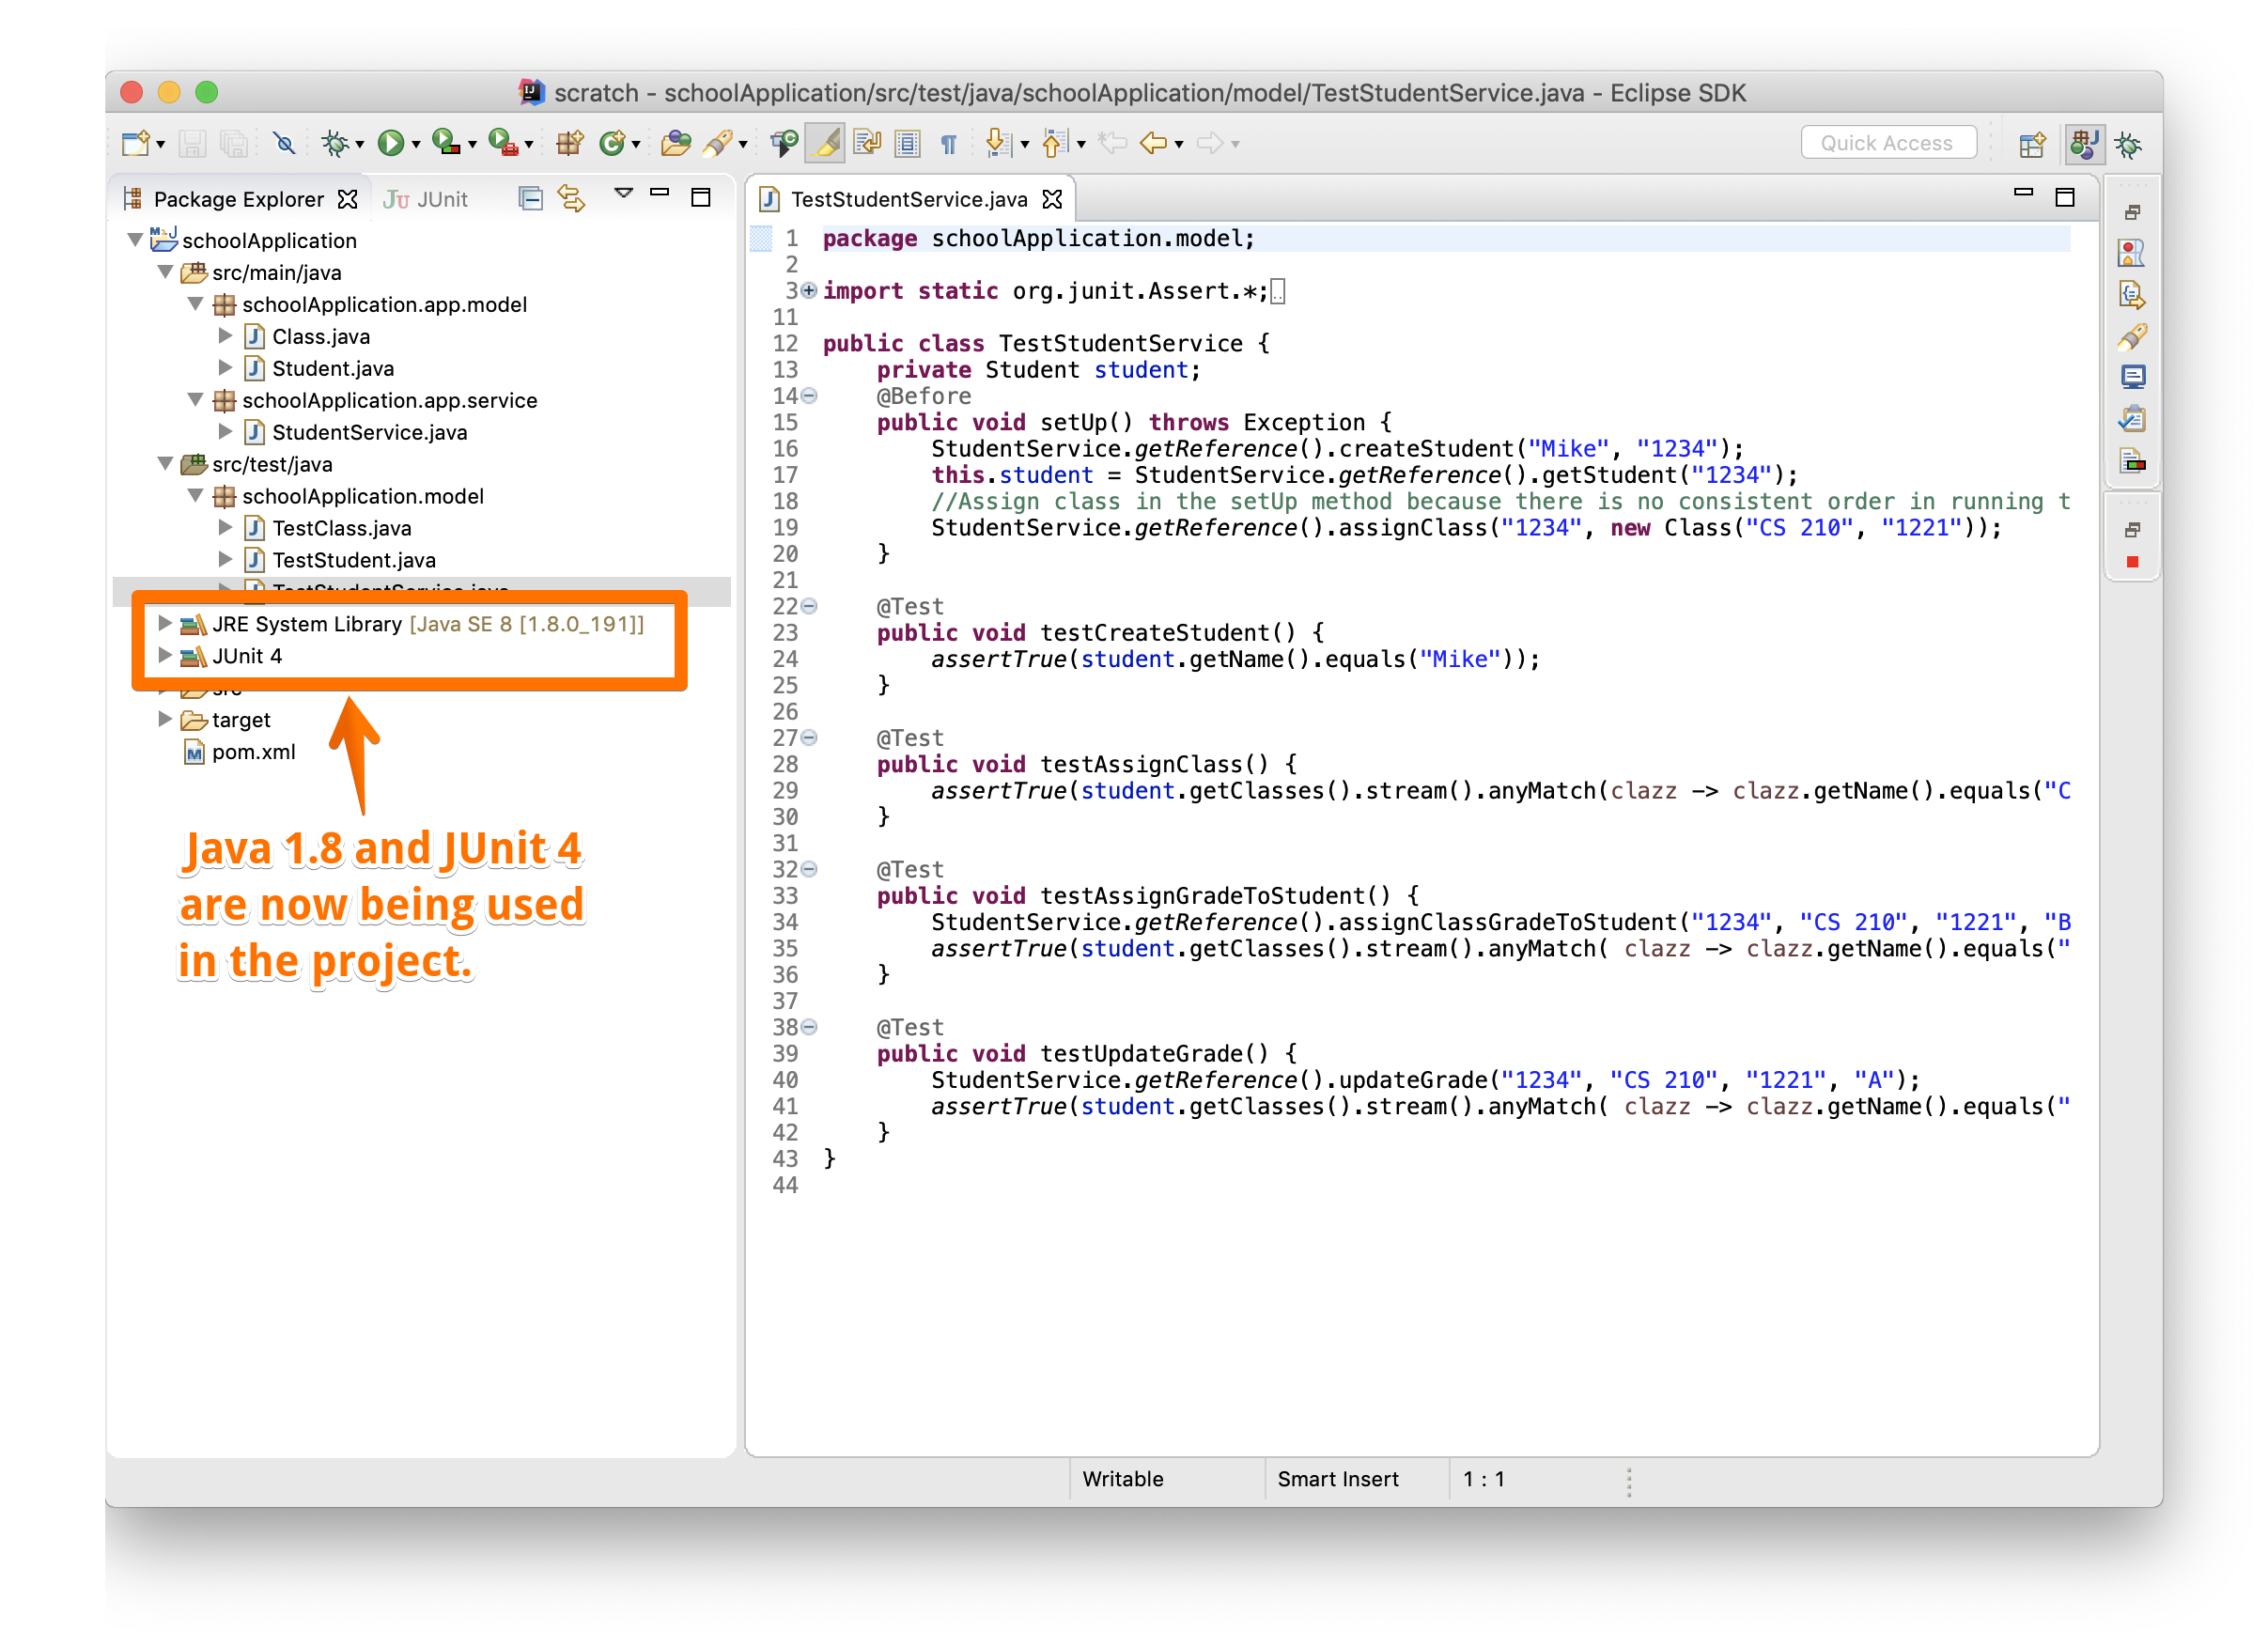
Finally, all the red 'X' indicators are gone because the project is now referencing the correct Java version and JUnit.
Step 12
Finally, all the red 'X' indicators are gone because the project is now referencing the correct Java version and JUnit.
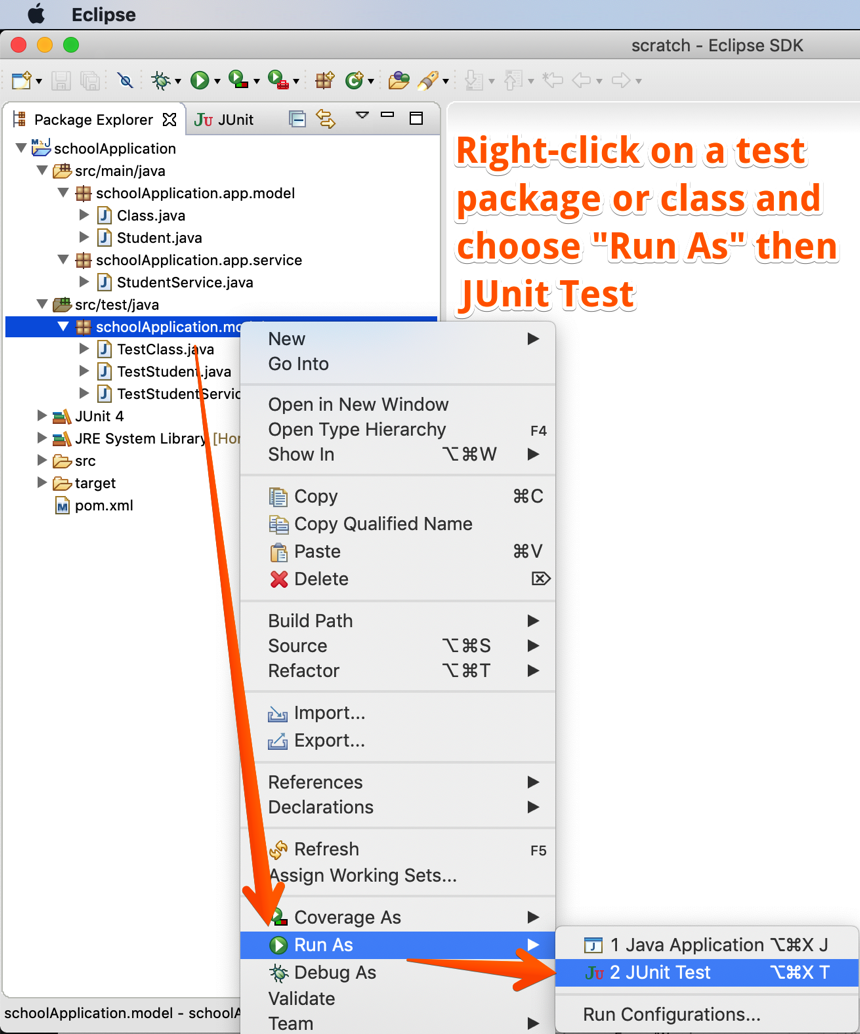
Step 13
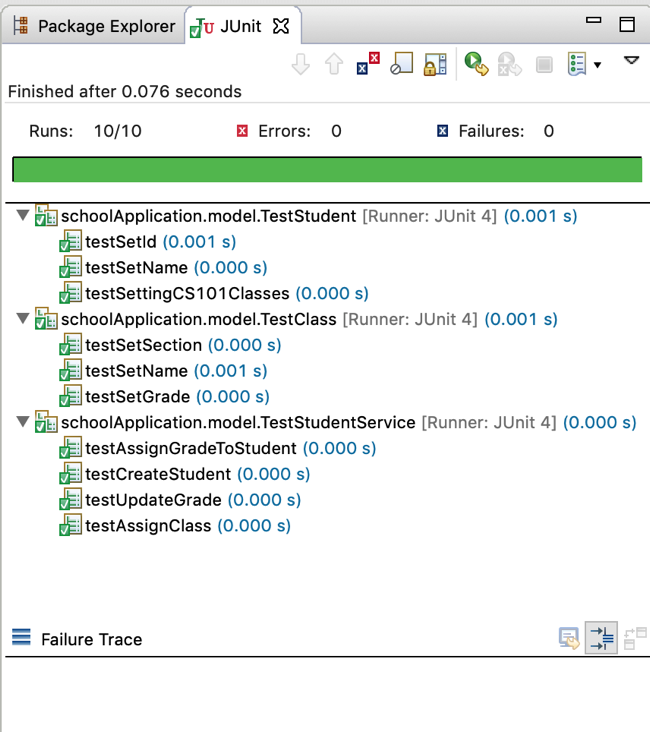
Everything is set up correctly when you see results such as this: